10 Expert Tips on How to Clean Your Car Paint
How to Clean Your Car Paint
Clean your car paint is more than just an aesthetic choice; it’s essential for maintaining the vehicle’s overall condition and resale value. Proper care and cleaning can prevent damage from environmental contaminants such as bird droppings, tree sap, road salt, and industrial fallout and keep the paint looking vibrant and glossy. This guide will walk you through everything you need to know about effectively cleaning your car paint, from understanding the different types of products available to mastering the best application techniques.
Cleanning your paint does not mean merely washing your car. It involves using a pre-wax cleaner to remove oxidation and contaminants, adding emollient oils back into the paint to improve brilliance, and preparing the paint for wax. However, it’s important to note that using the wrong products or techniques can actually damage your car’s paint. For example, using a harsh cleaner or scrubbing too hard can strip away the clear coat, leaving your paint vulnerable to damage. Several pre-wax cleaners on the market will accomplish one, two, or all three of these functions. There are so many products, by so many names, that the correct choice may need to be clarified.
Understanding Car Paint
The layers of car paint are designed to protect and enhance the appearance of your vehicle. A modern car paint job typically includes a basecoat, which provides color, and a clear coat, which adds a glossy finish and extra protection. The clear coat is vital because it shields against UV rays, dirt, and other environmental elements. However, this clear coat also requires regular maintenance to keep it from becoming dull and damaged.
Clear Coat Paint
Before discussing pre-wax cleaners, it is crucial to clarify a major misconception caused by misleading advertising: the idea that “clear coat” is a miracle automotive finish that does not require waxing. This is a common misunderstanding! The clear coat is nothing more than paint without pigment. It requires a protective wax or polymer sealant coating, just like any other paint. We want you to be aware of this to ensure you’re taking the right steps to maintain your car paint.
Some people feel that clear-coated (two-stage) paints tend to show scratches and swirls more than the older pigmented (single-stage) paints because they are soft. This is not true. Clear-coated paints show minor swirls and scratches more readily than pigmented paints due to an optical effect called “backlighting.” When you look at your car’s surface, you see light reflected off the pigmented paint. Light penetrates the clear coat and reflects off the pigmented paint below, “backlighting” any imperfections in the clear coat’s surface. Single-stage paints, on the other hand, combine color and clear coat in one layer, making them more resistant to scratches and swirls.
Anytime you “backlight” imperfections, you make them more visually obvious. For example, if you drive towards the setting sun or oncoming headlights on a rainy night, every speck of dirt, smudge, or smear on your windshield is suddenly painfully obvious. They were there for the rest of the day. Still, they were not noticeable until sunset or when oncoming headlights “backlighted” them. The same thing happens with clear-coated paints. The reflected light from the pigmented paint layer “backlights” the minor swirls and scratches on the clear coat paint’s surface, making them more visually obvious. The notation “clear coat safe” means that any abrasives are fine enough not to cause “visible” scratches in the top clear coat.
Ensuring your clear coat is properly protected and maintained is not just a task; it’s a responsibility for the overall appearance and longevity of your car’s paint job. Using the right products and techniques we will guide you through can help preserve its clarity and shine.
Next, let’s examine the various pre-wax cleaners essential for keeping your car’s paint in top condition.
Types of Pre-Wax Cleaners
To better understand pre-wax cleaners, we must define some broad categories of products. A pre-wax cleaning agent may be either friction or chemical. These products are designed to prepare your car’s paint surface by removing contaminants, old wax, and minor imperfections, making it ready for waxing or sealing.
Friction vs. Chemical Cleaners
A friction pre-wax cleaner is usually either a silicate or clay particulate. Examining your paint through a microscope would look like a mountain range with peaks and valleys. The friction or abrasive (do not get nervous at the word abrasive) type pre-wax cleaner will clip the tops of these mountains off and help fill in the valleys with a heavy molecular weight emollient oil to approach the optimum smooth plane that offers the greatest depth of shine.
Friction pre-wax cleaners are usually classified from glaze (least aggressive), fine cut, medium cut, and heavy cut to compound (most aggressive). Rule #1: Use the least aggressive product to get the job done. This ensures that you do not remove more paint than necessary, preserving the integrity of the clear coat.
A chemical pre-wax cleaner, usually classified as a polish, will only remove oxidation or stains and not help smooth the paint. A pre-wax cleaner should also remove old wax and other contaminants in the paint. Chemical-type pre-wax cleaners are usually more effective in removing the remains of 100 M.P.H. bugs, stains, tree sap, and tars. Avoid silicone-based products as they are not beneficial to paint and may cause problems down the road. Ask any professional car painter for their thoughts on silicone products; you will usually get a 30-minute tirade.
Glaze
A glaze generally denotes a superfine friction type of pre-wax cleaning agent, usually with essential emollients and lubricating oils. It may even contain some mild chemical cleaners. Glazes usually remove mild swirl marks and minor scratches, refresh the paint with emollient oils, and smooth the finish. They are perfect for enhancing the shine and depth of your car’s paint, especially on darker colors.
Polish
A polish is usually a nonabrasive product based on a nutrient oil matrix that contains a chemical cleaner. Most polishes use a heavy molecular-weight oil that “feeds” the paint and may help hide extremely minor swirl marks. Quality polishes will usually provide the deepest shine. Polishes are excellent for maintaining the luster of your car paint without causing any abrasive damage.
Compound
A compound is the “coarse sandpaper” of the paint-cleaning world. This should be used only if the paint is in serious trouble and all else has failed. You may consider a compound if you are one step away from 1-800-NEW-PAINT. Compounds are highly abrasive and should be cautiously used, preferably by experienced detailers.
Cut Cleaner
A cut cleaner, usually graded as fine, medium, heavy, or extra heavy, is a friction cleaner that is more aggressive than a glaze but less aggressive than a compound. These are designed for the more stubborn scratches, swirls, or imperfections that a glaze will not remove. They are ideal for addressing moderate paint defects without resorting to the harsh abrasiveness of a compound.
Clay
A plasticine/abrasive mixture is used to smooth new paint and remove fresh paint overspray. This type of product must be used with lots of lubricant. The technique of using clay is a learned skill. Use too little lubricant or get contaminants in the clay, and you have moved into the scratch city. This product is the fastest lane to trouble if not used with extreme care. Clay bars are excellent for removing bonded contaminants from the paint surface. Still, they should be used sparingly to avoid unnecessary paint removal.
Cleaner/Wax
A combination of one-step chemical cleaner and a wax. I prefer to avoid these types of products, as they are required to perform two very diverse functions simultaneously. A pre-wax cleaner should remove old wax, so how does it simultaneously apply a new wax coat? You can use this product only in emergencies or on your daily beater. They are convenient for quick touch-ups but offer a different level of protection and cleaning than separate products.
Wax
Wax has incorrectly become a generic term for all paint protectants. There are two basic categories of paint protectants: organic waxes and polymer sealants. Technically, a polymer is not a wax but is classified as a sealant. Most people refer to them as waxes or “synthetic” waxes. Wax is an organic compound derived from plants, such as the Carnauba plant, or from varmints, such as beeswax. Some discount store/auto parts store specials contain paraffin refined from dead dinosaurs. The polymer sealants are usually collected from specially trained robotic bees that gather the polymer nectar from plastic flowers (or they may be made in chemical factories).
Degreasers/Tar/Bug Removers
These products are normally solvents designed to dissolve surface contaminants, such as road tar or bugs. There are two broad classifications of solvents: petroleum distillates and citrus-based. Quality citrus products are better at removing organic contaminants such as bugs or sap and tend to be gentler on the paint. Petroleum distillates are better at removing tar.
Any degreaser/tar/bug remover will also remove wax. After you have rid your car of the remains of Billy Bee, you will have to reapply a coat of wax to the area. (What is the last thing that goes through a bee’s mind as he slams into your windshield at 60 mph?…… His stinger.) Be aware that many of the popular discount store/auto parts store tar removers are based on kerosene and may cause long-term damage to paint.
Using the correct type of pre-wax cleaner is crucial for maintaining the integrity and appearance of your car’s paint. Always choose the least aggressive product necessary to achieve your desired results, and follow up with proper protection to keep your paint looking its best.
Next, considering different factors and environments, we will explore how often you should clean your car paint.
How Often Should You Clean Your Car Paint?
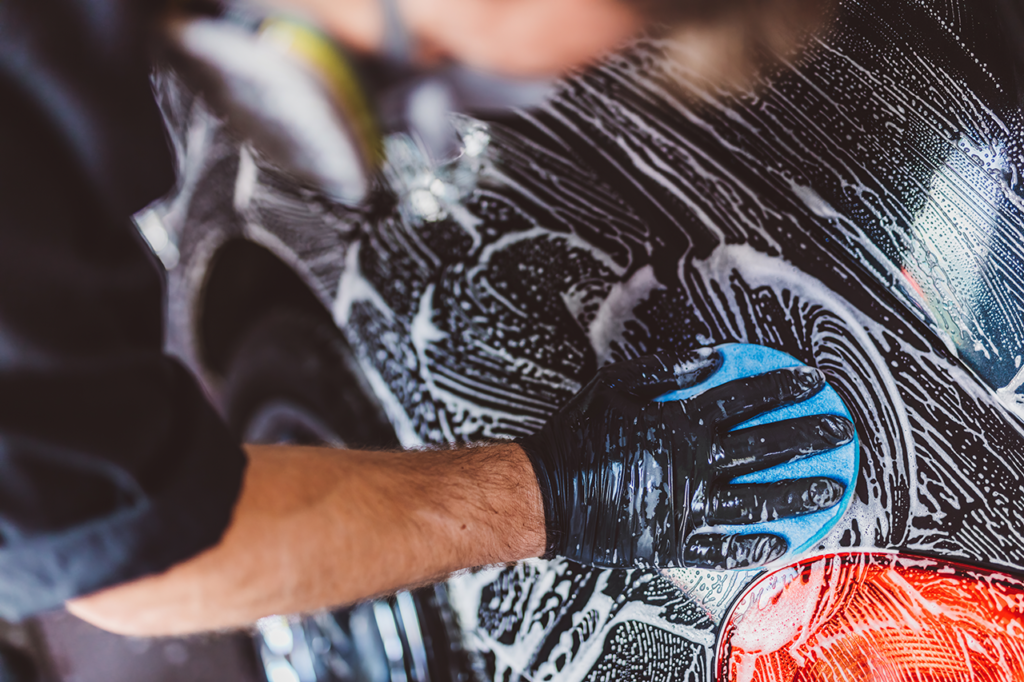
The correct answer is based on several factors. If your car is a “garage queen” and only sees the outside world once a week or so, then once a year is usually sufficient. If it is a daily driver and sits out in the elements day after day, then twice, three times a year, may be required. Your paint will tell you when it needs to be cleaned. It may scream at the top of its little lungs or be more subtle, lose its luster, and look dull (you know your paint better than I do).
Environmental Factors
Suppose the paint is subjected to acid rain and the effects of highly acidic bird offerings. In that case, you may have to clean specific areas of the paint more often. These environmental contaminants can cause significant damage to the paint if left untreated, so spot cleaning is necessary in these cases.
In my humble opinion, power tools, inexperience, and fine automobiles do not mix. Suppose you must use a buffer, practice, practice on someone else’s car or a junk body panel. There is nothing that a power buffer can do that you cannot do by hand. The advantage of power is speed. This also applies to getting yourself into trouble. The edges of your body panels and raised/creased areas of the sheet metal have the thinnest layer of paint. When the paint is applied, the liquid paint will flow away from these raised areas. A power buffer will concentrate its energy on the thin paint of these high points. This is another way of saying hello to your primer or, as the professionals say, “burning an edge.”
If you must use a power buffer, use only closed-cell foam pads and one pad for each product. Do not use lamb wool pads, as they are swirl marks waiting to happen. Most importantly, use only a cleaner/glaze/polish product specifically formulated for use with a power buffer. The frictional heat of a buffer will cause some products’ abrasives to flocculate or clump together, making your paint look like a newly plowed cornfield. Most people do not appreciate this look.
Knowing how often to clean your car paint involves understanding your vehicle’s specific needs and exposure to various elements. A balanced approach will keep your paint in excellent condition without overworking it.
Determining the Right Frequency
A general rule of thumb for most cars is to clean the paint at least twice a year, particularly if the vehicle is regularly exposed to harsh environmental conditions. However, you should always be guided by the appearance and feel of the paint. If it starts looking dull or feels rough to the touch, it’s time for a clean.
Assess the Condition Regularly
Your paint will provide visual cues when it needs attention. Regularly assessing the condition of your car paint can help you determine the right time for cleaning. If you notice any signs of oxidation, stains, or loss of gloss, these are indicators that your paint needs to be cleaned and protected.
Specific Scenarios
If someone tells you to clean your car paint each time you wax, they are either trying to sell you another paint job or have an excess of pre-wax cleaner they are trying to unload. This advice generally does not consider the individual needs of your car paint and can lead to unnecessary wear.
In essence, the frequency of cleaning your car paint depends on how often you drive your car, the environmental conditions it faces, and the quality of the initial paint job. Always use your judgment and the visual condition of the paint as your primary guide.
Next, we’ll discuss the importance of choosing the proper cloths for cleaning your car paint and how to maintain them to ensure optimal results.
Choosing the Right Clothes to Clean Your Car Paint
The clothes you use for polishing and buffing your car are critical to a flawless finish. Using the correct type of cloth can prevent scratches, swirl marks, and other imperfections that detract from your car’s appearance. This section will guide you through selecting and maintaining the best clothes for optimal performance.
Microfiber vs. Cotton Cloths
Microfiber is often preferred among car detailing professionals when choosing the right clothes. Microfiber cloths are made from a blend of polyester and polyamide, offering a soft, gentle touch that is less likely to scratch the paint. They are highly absorbent and can trap dirt and dust particles within their fibers, reducing the risk of dragging contaminants across the paint surface.
High-quality microfiber buffing/polishing cloths with microfiber silk-bound edges or 100% cotton flannel cloths are ideal. Cotton cloths, particularly those made from 100% cotton flannel, are also effective but should be used carefully to ensure they do not leave lint or cause scratches.
Proper Care for Cleaning Clothes
Proper care is essential to maintaining the quality and effectiveness of your cleaning clothes. Wash them in the washing machine using only detergent. Do not add fabric softener to the water, as softeners can leave residues that may cause streaks or degrade the cloth’s effectiveness. Dry the clothes in the dryer, but DO NOT use an anti-static dryer sheet (I think that’s what it’s called). Dryer sheets contain coatings transferred to your car cloths and may cause streaks.
After washing and drying:
- Store your cloths in a clean, dust-free environment to keep them ready for use.
- Shake out the cloths frequently (away from the car) to remove any residue on the cloth during use.
- Keep using new sections of the cloth and change cloths frequently to avoid reapplying contaminants to the paint.
Application Techniques
All glazes/polishes should be applied to a cool surface in the shade. Never wash, clean, or wax your car in the hot sun. Rule #2: If you can comfortably hold your hand on the paint’s surface, then you can clean and/or wax your car.
Apply the product with a soft, 100% cotton flannel cloth, microfiber foam applicator pad, 100% cotton/foam applicator pad, or closed-cell foam pad. Squirt a small amount onto your pad or cloth and then apply it to the paint surface. Do not squirt any product directly onto the surface, as you will tend to use too much and may wind up with an uneven result.
Work the glaze or polish into the surface with a linear motion, front-to-back, back-to-front, the way the air flows over the car. Do not go around in circles. If a piece of grit lodges under your pad, you have made sandpaper, and a circular motion will produce a 360-degree swirl mark. All scratches are most visible at a 90-degree viewing angle, so a circular swirl is visible from any vantage point. A linear type scratch is only noticeable from a very narrow viewing angle.
Work the glaze/polish into the surface using moderate pressure until all that is left is a very slight haze. Moderate pressure may be defined as greater than spreading jelly on bread and too heavy if you are bending metal. (Read the directions on the bottle to determine the manufacturer’smanufacturer’s recommended method.) Buff off the slight haze with a high-quality microfiber buffing/polishing cloth or a soft, 100% cotton flannel cloth. Shake out the cloth frequently (away from the car) to remove any residue on the cloth. Keep using new sections of the cloth and change cloths often.
My personal favorite is the Blu-Velvet Microfiber Buffing/Polishing Cloth. They are super soft and produce a brilliant shine. When the chosen panel of the car has been completed, rebuff with another clean microfiber buffing/polishing cloth or soft, 100% cotton flannel cloth. If you are happy with the shine and deep gloss of the panel, then apply a coat of your favorite wax.
Using the proper cloths and techniques ensures a pristine, swirl-free finish on your car paint. Always use clean, high-quality cloths and follow the recommended application methods for the best results.
Next, we will explore various application techniques for different pre-wax cleaners, polishes, and waxes to help you achieve a professional finish.
Application Techniques
Applying pre-wax cleaners, polishes, and waxes is crucial for achieving a professional finish on your car’s paint. This section will guide you through the step-by-step process, whether you are working by hand or using a power buffer.
Hand Application
Hand application is often preferred by car enthusiasts and professionals for its control and precision. Follow these steps to ensure a practical and safe application:
- Prepare the Surface: Start by washing your car with a quality car wash soap and thoroughly dry it. This step removes loose dirt and debris that could cause scratches during cleaning.
- Choose the Right Product: Based on the condition of your paint, select the appropriate pre-wax cleaner, polish, or wax. For instance, use a glaze for minor swirls, a polish for routine maintenance, and a compound for severe oxidation or scratches.
- Apply in the Shade: Always apply products to an excellent surface and in the shade. Direct sunlight can cause the product to dry too quickly, leading to uneven application and potential damage.
- Use a Soft Applicator: Apply the product with a soft, 100% cotton flannel cloth, microfiber foam applicator pad, 100% cotton/foam applicator pad, or closed-cell foam pad. Squirt a small amount onto your pad or cloth and then apply it to the paint surface.
- Work in Linear Motions: Work the product into the surface with a linear motion—front-to-back, back-to-front—the way the air flows over the car. Avoid circular motions, as they can create visible swirl marks if a piece of grit lodges under the pad.
- Moderate Pressure: Use moderate pressure, which is defined as more than spreading jelly on bread but not enough to bend metal. Work the product into the surface until only a slight haze remains.
- Buff to Shine: Buff off the slight haze with a high-quality microfiber buffing/polishing or a soft, 100% cotton flannel cloth. Shake out the cloth frequently (away from the car) to remove any residue on the cloth. Keep using new sections of the cloth and change cloths often.
- Final Buffing: When the chosen panel of the car has been completed, rebuff with another clean microfiber buffing/polishing cloth or soft, 100% cotton flannel cloth. If you are happy with the panel’s shine and deep gloss, then apply a coat of your favorite wax.
Power Buffers
Using a power buffer can save time and effort but requires skill and caution. Here’s how to use a power buffer effectively:
- Practice First: If you must use a buffer, then practice, practice, practice on someone else’s car or a junk body panel. There is nothing that a power buffer can do that you cannot do by hand. The advantage of power is speed, but it also applies to getting yourself into trouble.
- Use Closed-Cell Foam Pads: Use only closed-cell foam pads, one pad for each product. Do not use lamb’s wool-type pads, as they are swirl marks waiting to happen.
- Select the Right Product: Use only a cleaner/glaze/polish type product specifically formulated for use with a power buffer. The frictional heat of a buffer will cause some of the product’s abrasives to flocculate or clump together, making your paint look like a newly plowed cornfield.
- Avoid High Points: Be careful around the edges of body panels and raised/creased areas of the sheet metal, as these spots have the thinnest paint layer. A power buffer will concentrate its energy on the thin paint of these high points, potentially “burning an edge.”
- Apply Evenly: Apply the product evenly to the foam pad, not directly onto the paint. Spread the product over a small paint section before turning on the buffer.
- Low Speed: Start with a low-speed setting to spread the product without slinging it everywhere. Gradually increase the speed as you work the product into the paint, using moderate pressure.
- Keep Moving: Keep the buffer moving to avoid concentrating too much heat and friction in one spot. Overlapping passes will ensure an even application.
- Buff to a Gloss: After applying the product, use a clean microfiber cloth to buff the area to a high gloss. Inspect the surface in good lighting to ensure all swirls and scratches have been removed.
Common Mistakes to Avoid
- Applying Products in Direct Sunlight: Never apply cleaners, polishes, or waxes in direct sunlight. The heat can cause the product to dry too quickly, leading to streaks and an uneven finish.
- Using Too Much Product: Less is more when applying car care products. Using less product can lead to buildup and make buffing more difficult.
- Skipping Steps: Be sure to complete all of the steps in the cleaning process. Each step—from washing to polishing to waxing—is critical in maintaining the paint’s condition.
- Neglecting to Clean Buffing Pads: Always keep your buffing pads clean. Dirty pads can transfer contaminants to the paint, causing scratches and swirls.
Mastering the application techniques for different car care products can significantly enhance the appearance and longevity of your car’s paint. Whether you work by hand or with a power buffer, following these guidelines will help you achieve a professional, swirl-free finish.
Next, we’ll explore the different brands of pre-wax cleaners, polishes, and waxes that are highly recommended for maintaining your car’s paint.
Brand Recommendations
When it comes to maintaining your car’s paint, choosing the right products from reputable brands is essential. Numerous brands are in the market, but some have stood out due to their quality and effectiveness. This section will overview some of the most trusted brands and their best pre-wax cleaning, polishing, and waxing products.
3M Imperial Hand Glaze: I have tried just about every product on the market and keep coming back to 3M Hand Glaze. It is gentle on the paint, produces, in my humble opinion, the deepest “wet-look” gloss, yet is aggressive enough to remove fine swirl marks and scratches. It also “feeds” the paint with emollient oils. If an area needs a little more aggressive cleaning, place a 2 inch diameter dollop of 3M Imperial Hand Glaze on your pad and add a small amount (about the size of your pinkie nail) of P21S Multi Surface Finish Restorer, mix the two together on the pad and then rub out the area using a linear motion. Buff off the slight haze with a Blu-Velvet Microfiber Buffing/Polishing Cloth or a soft, 100% cotton flannel cloth and repeat the process if necessary. This combo works very well on swirl marks and scratches that may be seen but not detected with your fingernail. Once the blemish has been removed, follow with an application of straight 3M Imperial Hand Glaze to restore the deep shine and then wax. The recess behind the door handles is a classic area that responds well to this combination.
3M Foam Pad Polishing Glaze – Dark or Light: A fine glaze, with additional filling solids, that quickly removes and fills light surface imperfections, swirl marks and light oxidation. It produces a deep, rich, swirl free paint finish, and may be applied either by hand or slow speed buffer. The dark glaze is best used on darker color paints such as black or dark blue and the light glaze on all others.
3M Rubbing Compound: A fine cut rubbing compound to remove 1200 grit sanding marks, coarse swirl marks or heavy oxidation. It may be used by hand or with a slow speed buffer and a closed cell foam polishing pad. Compounds are very aggressive, and should be used very carefully.
3M Perfect-It III Finishing Glaze: A machine or hand applied, superfine, liquid glaze to clean, polish and remove swirls, oxidized pigment, acid rain marks, swirls and fine scratches. Formulated for fully cured paint and will produce a deep, “wet look” when used with a slow speed buffer and a closed cell foam polishing pad.
3M Perfect It III Machine Glaze: A more aggressive machine glaze developed for fully cured paints to remove minor scratches, wet sanding or compounding swirl marks. Does not contain silicone or wax. Apply with a slow speed buffer and a closed cell foam polishing pad.
Harly Pre-Wax Cleaner: A pre-wax cleaner and polish for all fully cured paints. Polishes out very minor paint blemishes and feeds the paint with rich nutrients to bring out vibrant color and brilliance while extending paint life
Meguiar’s #1 Medium Cut Cleaner: A moderately abrasive cleaner to remove surface defects including harsh swirl marks, oxidation, water marks and wet sanding marks. Follow with a fine glaze (3M or #7) and a coat of wax. This is the “medium sandpaper ” of the abrasive cleaner set, so use only if your regular glaze will not do the job.
Meguiar’s #2 Fine Cut Cleaner: A mildly abrasive cleaner for fine swirl marks, water spots, and fine defects. Follow with a fine glaze and a coat of wax. The “fine sandpaper” in the abrasive cleaner family.
Meguiar’s #6 Cleaner/Wax: A one-step chemical cleaner with a liquid wax. Use for spot application when your favorite cleaning/wax regimen is not practical or use on your “beater”.
Meguiar’s #7 Showcar Glaze: This is a polish (chemical cleaner with an emollient oil matrix) that works well on clear coat finishes that are in reasonably good shape. May be applied with either a machine or by hand.
Meguiar’s #9 Swirl Remover: A hand or machine applied glaze to remove fine swirls and water spots. Also adds emollient oils back into the paint. Follow with a coat of quality wax.
Meguiar’s #80 Speed Glaze: A medium fine glaze designed for use with a slow speed buffer and Meguiars Softbuff Polishing Pads. The medium fine abrasives and penetrating nutrients effectively revitalize the paint and restore the original brilliance.
Meguiar’s #82 Swirl Free Polish: A light cut cleaner/polish for clear coat and single stage paints. Polishes out very minor paint blemishes and feeds the paint with rich nutrients to bring out vibrant color and brilliance while extending paint life.
Meguiar’s #83 Dual Action Cleaner/Polish: A medium cut cleaner/polish to remove light to medium paint blemishes, swirls and stains. Feeds the paint with rich nutrients to bring out vibrant color and brilliance while extending paint life
Meguiar’s #105 Ultra Cut Compound: An ultra fast cutting, low swirl compound formulated for abused and neglected paints. Effectively removes 1200 grit sanding marks, acid rain etching, heavy oxidation and major paint problems. On a scale of 10 this is an abrasive level 12.
One Grand Clean N Wax: A one step chemical cleaner, filler and liquid wax. Will hide minor swirl marks and apply a coat of wax in one operation. This is the best choice for one step applications or for use on large bus or truck type vehicles.
One Grand Omega Glaze: A fine, water-based abrasive glaze that may be applied by hand or machine. Leaves a nice paint finish. Seems to work better on American/Japanese paints than European paints.
One Grand Special Touch: An aggressive combination chemical cleaner and glaze developed to remove minor swirls, water spots and other surface defects from clear-coated paints.
P21S Gloss Enhancing Paintwork Cleanser: A thick, rich, creamy, polish that leaves a deep shine and removes minor staining. It is my absolute favorite product to clean any paint that does not have scratches. Very easy to apply and buff off and produces the best, deepest gloss, “wet look” shine of any product I have ever tried. (Read between the lines?) If you want the ultimate depth of shine, the rich emollients in Paintwork Cleanser should be used as the base.
Zymol HD Cleanse: Zymol offers the “pina colada” experience for those who enjoy the olfactory stimulation, while cleaning their paint. A touch aggressive for my taste but defended to the death by Zymol addicts.
* Car Care Specialties would never do anything to harm animals. Including rodents that stuff our tailpipes with debris.
Conclusion
Maintaining the integrity and shine of your car paint is crucial for both its aesthetic appeal and long-term value. Through consistent care and proper products and techniques, you can keep your vehicle looking pristine and protect it from the elements.
Final Thoughts
Maintaining your car paint is a rewarding endeavor that requires dedication and attention to detail. By following the guidelines and tips in this comprehensive guide, you can protect your car’s paint, enhance its appearance, and preserve its value for years. Regular maintenance, the right products, and proper techniques are the cornerstones of effective car paint care.
Whether you are a casual car owner or a dedicated car enthusiast, taking the time to clean your car paint is an investment in your vehicle’s longevity and beauty. Keep your car shining brightly, and enjoy driving a well-maintained vehicle.
If you have any questions or if you need any further information, please feel free to contact us.